
Jira Project Recovery Guide: How To Restore Deleted Jira Project
If you lose a Jira project it can seem like a terrifying experience, but there are ways to restore those deleted projects. Whether it’s an unintentional or purposeful deletion that has to be reversed, if you understand Jira’s restore functionality and the value of backup solutions, it may save a lot of your time, money, and work.
This article will lead you through the process of restoring a deleted project in Jira, and highlight the limitations of Jira’s native capabilities as well as why specialized backup solutions are a better option.
Jira’s native capabilities to restore projects
In case your project gets lost e.g. deleted either intentionally or accidentally, Jira does provide some (limited) support.
When a service project is deleted and placed in Jira’s trash, certain features and rules are affected:
- Timers associated with SLAs will stop, and related automation rules won’t execute.
- Rules-based on SLA time and status changes won’t run.
- Automation rules that carry out actions on issues will fail and will not be retried.
- After restoration, these rules will resume but will activate only when operations are performed on the existing issues.
- Incoming email requests sent during the time, for which the project is in the trash will not be processed.
- New deployment requests also won’t be possible, but existing requests, which are pending or paused will remain in their current state.
Jira administrators can view the date a project was moved to the trash and who moved it; check when a project will be permanently deleted, as well as restore or permanently delete projects from the trash.
How to restore a project with Jira’s Native Restore option
If you need to restore a deleted project from the trash in Jira and have decided to use Jira’s native functionalities, follow these steps:
- Find “Settings” in the top-right corner and then, select “Projects”.
- In the sidebar, click on “Trash” to view deleted projects.
- Now, choose the project that you need to restore, and click on “More” (three dots), and press “Restore”.
If needed, you can re-enable email support for the project to function as before by going to “Project Settings”, then “Email Requests” and selecting “Turn on email support”.
Alternatively, you can archive your projects instead of deleting them. By archiving your project instead, you eliminate the possibility of your project being deleted after the 60-day period of time for which your deleted projects are retained in the trash.
Are there any downsides?
While Jira’s native restore feature seems beneficial, it does have limitations. Your deleted projects are only retained in the trash for 60 days before they are completely erased and cannot be recovered. Also, only users with administrator privileges can restore deleted projects. Furthermore, the integrity of your data may be put at risk, especially if modifications were made just before deletion. This could result in possible partial data loss. Jira’s native functionalities also lack granular restore capability, which means you can’t restore certain issues or configurations inside a project separately; it’s an all-or-nothing restore procedure.
Why is a backup solution a good idea?
Using a complete third-party backup solution for Jira has a number of benefits over simply depending on Jira’s native restore capabilities. Here are a few important advantages:
Unlimited retention
Unlike Jira’s 60-day retention limit, backup solutions can offer unlimited retention periods. This means your data is available to be restored no matter how much time has passed since deletion. Moreover, certain fields, such as the medical sector require long retention periods for purposes of archiving or for compliance.
Automated backups
Backup vendors give you the possibility to schedule backups however you want, to guarantee your data is continually secured without the need for user intervention. Automated backups limit the probability of human error and guarantee that the most recent data is regularly backed up, which lowers the possibility of data loss.
Granular restore
As opposed to an all-or-nothing approach, granular restore allows you to restore specific issues, settings, or project components. This flexibility allows you to save time and prevent data loss by selectively retrieving the necessary elements of the project rather than the complete project.
Point-in-time restore
Point-in-time restore allows you to restore data to a specified point in time, which is critical when dealing with data corruption or accidental alterations. This feature enables more accurate recovery, which leads to fewer interruptions to your operation while retaining data integrity.
Diverse restore options
A thorough backup strategy offers many recovery options to account for varied disaster scenarios. You should be able to restore to the same or a different Jira account, a free Jira account with no-user recovery, or even your local machine. These solutions provide flexibility and accessibility that allows you to restore your data in the manner that best meets your requirements.
Step-by-step restore process of a project in Jira
In this section, we will outline the process of restoring your deleted project using GitProtect.io. It’s rather simple and you can be sure that the projects you need can be restored in a blink of an eye…
Restore your projects with GitProtect.io
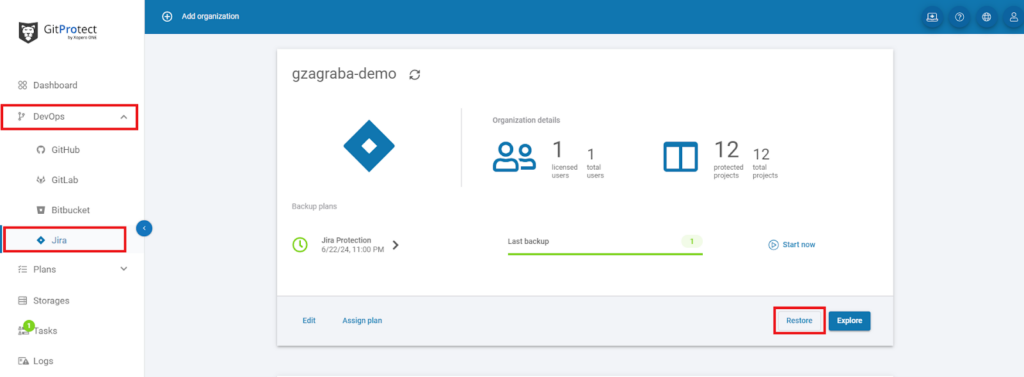
First, under “DevOps”, on the left side of your screen, choose “Jira”, since we are interested in restoring a Jira project. Then, on the right-hand side, click on “Restore”.
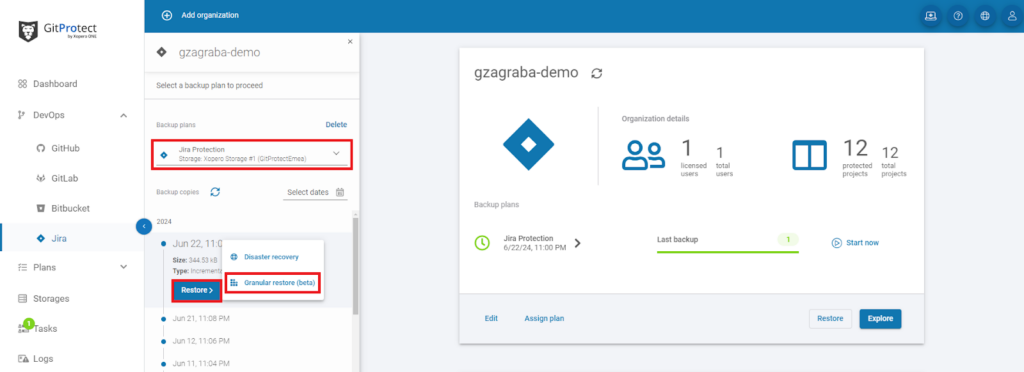
Then, on the left side of your screen, choose the backup plan you need. Under the relevant date, click “Restore” and you will have two options: “Disaster Recovery” and “Granular restore“ – choose the restore option, since we need to restore a Jira project.
Now, we have to pick the “Restore destination” of our project. You have three options: “Original organization”, “New organization”, and “Device (On-Prem)”. In this case, we will restore our project to the original organization. Once selected, hit “Next” on the bottom.

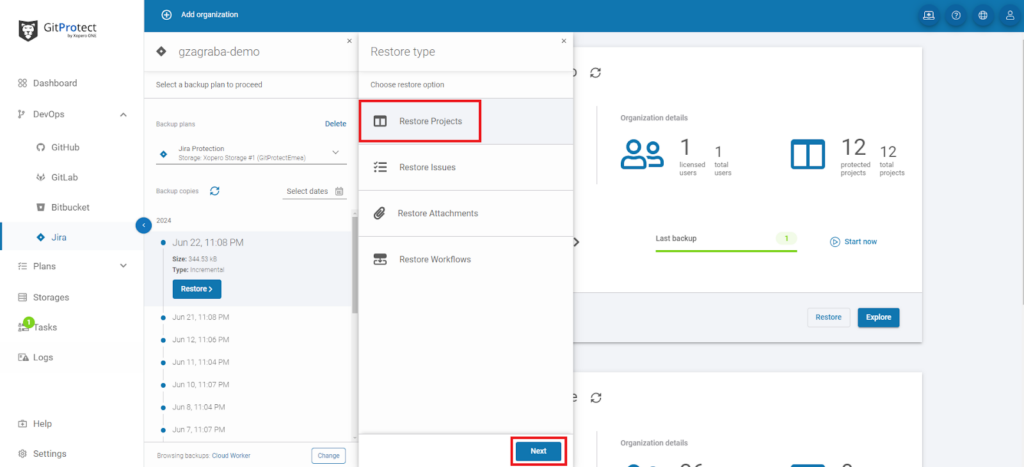
Next, we will select the type of restore process, which we want to carry out. You have the possibility to restore projects, issues, attachments, and workflows. As we are interested in restoring a project, select “Restore Projects” and click “Next” on the bottom.
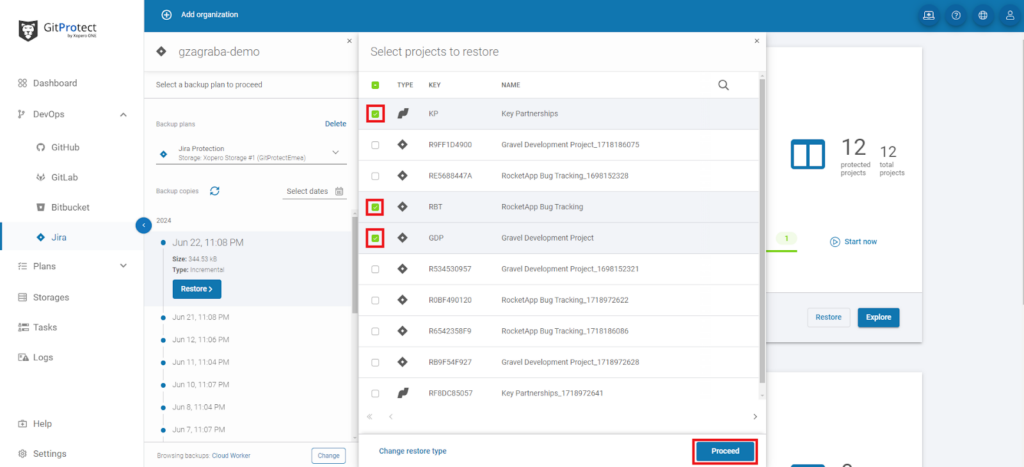
After we select the “Restore type”, we need to specify which projects we want to restore. You will see a list of your projects, which you can restore. By checking the boxes next to the relevant projects (the box will be green and checked), you identify which projects will be restored. When you’ve selected all the projects you want to restore, hit “Proceed”.
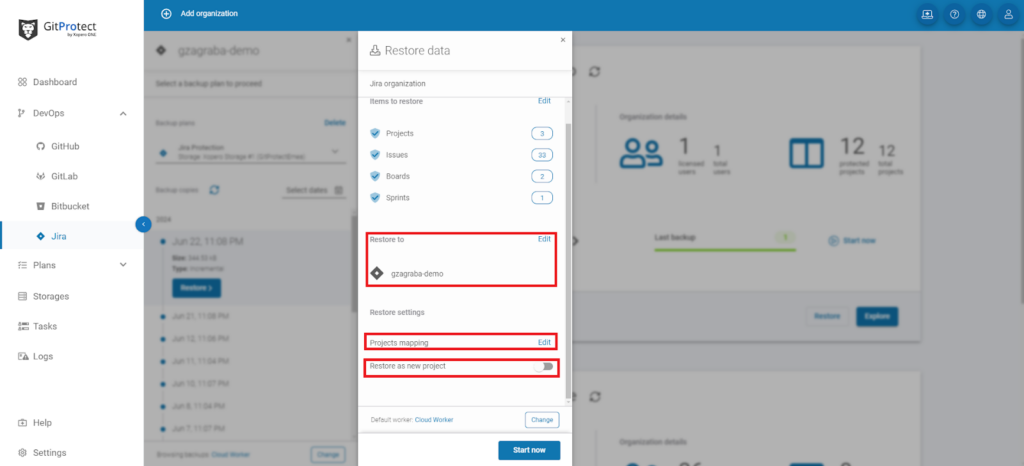
Now, you will see a confirmation of what items will be restored, where these items will be restored to (you can edit this), and the settings of the restore process (project mapping, which you can edit too, and whether you want to restore as a new project or not).
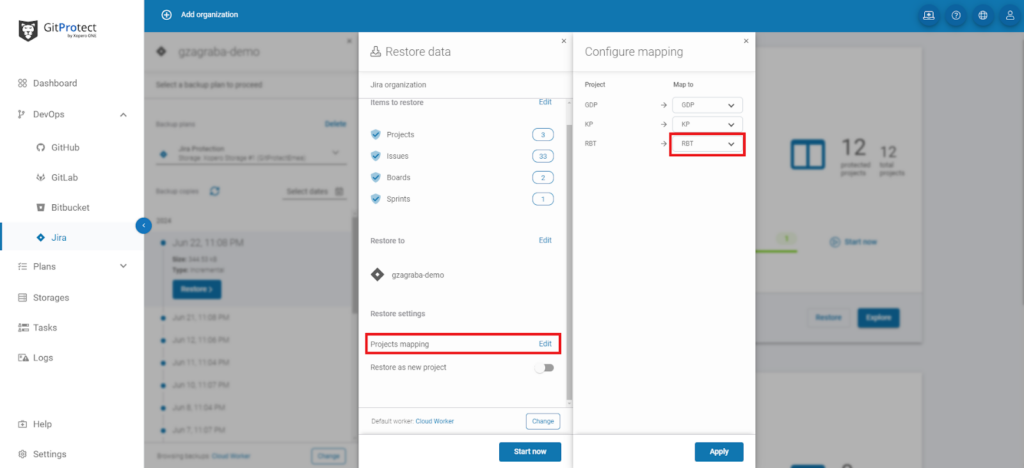
You can also configure the mapping. Click on “Edit” next to “Projects mapping”; Now, you will see the projects which you selected to restore under “Project”, and on the right, under “Map to” you can specify where the projects will be restored to.
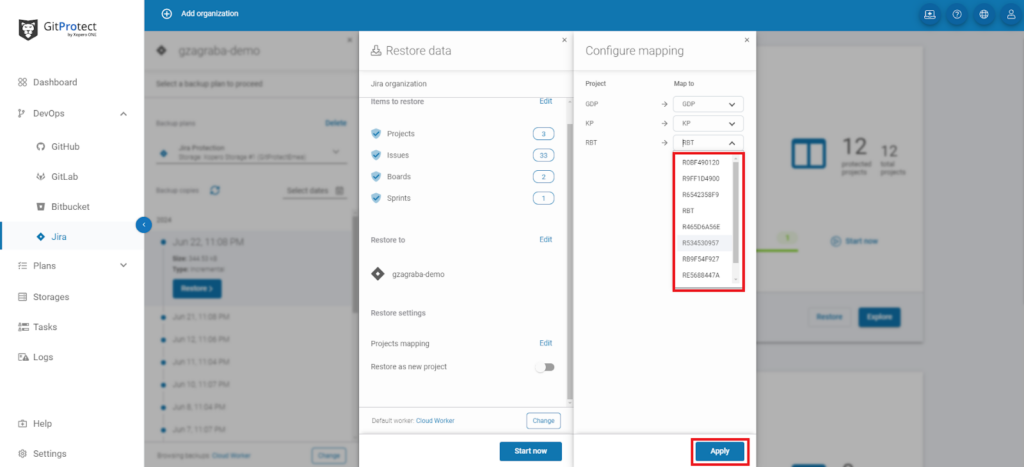
Now, when you click on any of the positions under “Map to”, you get to specifically choose where your project will be restored to.
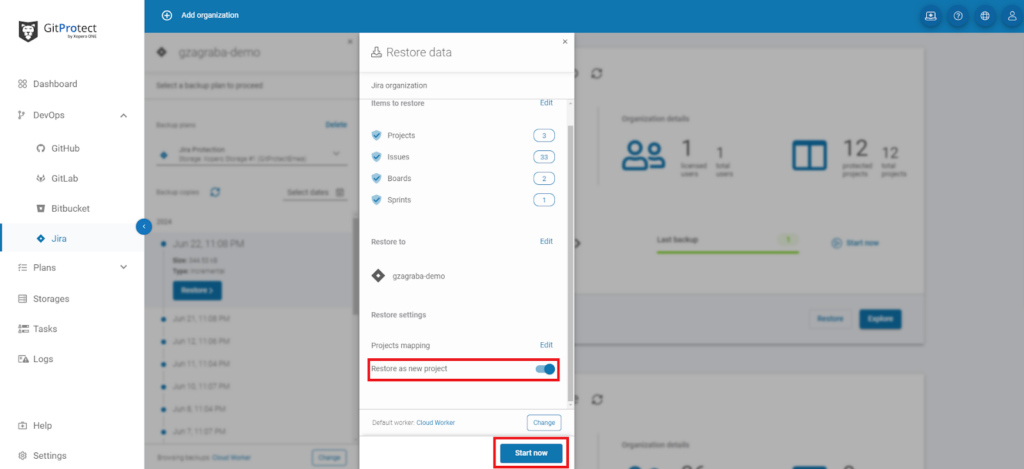
Finally, you can pick if you want your project restored as new or not – simply by clicking on the blue switch. Once all your settings are ready, hit “Start now” and “voilà”! Your projects are now being restored.
Takeaway
To sum up, the most reliable way to guarantee your deleted projects can be restored is to implement a third-party backup solution. Its main advantage over Jira’s native functionalities is the unlimited retention and granular restore feature. GitProtect.io, a professional backup and Disaster Recovery solution for Jira, will provide you with comprehensive and best-in-class functionalities to keep your data recoverable at all times following backup best practices. Beat the 48-hour backup frequency and 60-day retention period limits!