Jira Issue Recovery Guide: How To Restore Deleted Issues In Jira
Jira is a project management tool that helps IT teams simplify their DevOps and PM processes. Also, it supports easy collaboration throughout the team, thanks to the complex issue-tracking system.
However, one thing you should be cautious of… It is the accidental or intentional deletion of important issues. Why? The loss of even a piece of project data can have devastating consequences and throw your team a few steps back… What measures should be taken to minimize or even eliminate the consequences of the Jira data deletion? Let’s talk about it in this article…
Why should you back up your Jira data?
To start with, what about looking at the following scenario? Let’s say your team uses a backup script to protect Jira data, but unfortunately for you, the script overwrites your backed-up Jira data. Thus, if some of your issues are accidentally deleted and you haven’t noticed it on time before another backup, your data will be lost. So, you may need to recover deleted issues due to human errors, outages, and ransomware attacks are among the reasons for protecting your Jira issues and other Jira data to avoid data loss.
Another reason is the Shared Responsibility. Let’s not forget – the user (or customer) is responsible for his account’s data within the Atlassian Cloud Security Shared Responsibility Model.
What about the provider’s duties? It is responsible for the security of its service and infrastructure.
Compliance
One more aspect, that’s worth our attention is security compliance. If your organization is about to pass and comply with security protocols, like GDPR, SOC 2, HIPAA, or ISO 27001, then backup and Disaster Recovery strategy is a necessary measure.
Are there any options to restore a deleted Jira issue?
Recovering a deleted Jira issue is generally not possible through Jira’s built-in functionality, as the issue and all its associated data, like comments and attachments, can be permanently removed. Atlassian supplies its users with manual exports and imports, but it doesn’t provide granular restore. It also has a complete backup on the infrastructure level, not supporting a single account backup. In both situations, in case of accidental deletion of an issue(s), you will not be able to restore it. Once deleted, the issue is gone forever. But does it have to be that way?
To cover this challenge with a single Jira issue restore, you can use a third-party solution, like a backup and Disaster Recovery app found on Atlassian Marketplace, that permits granular restore of only specified data. Hence, for example, you will be able to restore only the necessary issue with all its data, including configurations, comments, attachments, links, tasks, and sub-tasks.
For Jira Data Center or Server users, restoring from a database backup is an option. However, this action will revert the entire instance to the state of the backup, overwriting any changes made since the backup was created.
Step-by-step guide on restoring Jira issues with GitProtect.io
Once you start backing up your Jira environment with GitProtect backup and Disaster Recovery software and create your backup plan, you can easily restore only a single piece of your Jira data.
So, let’s look at an example, go through the Jira issues restoration steps, and recover our deleted Jira data:
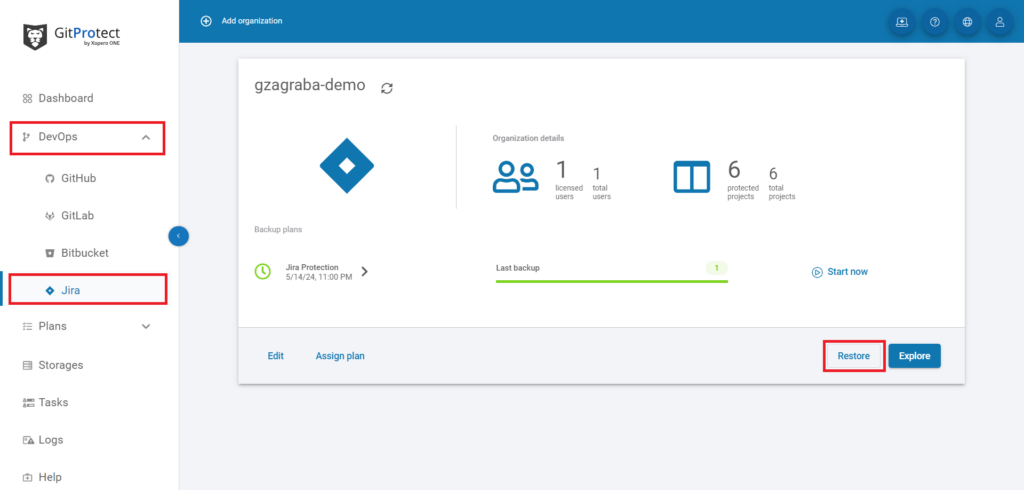
First, open your GitProtect.io interface and click DevOps on the left side of your screen. Then, choose Jira and press the Restore button on the right side of your screen.
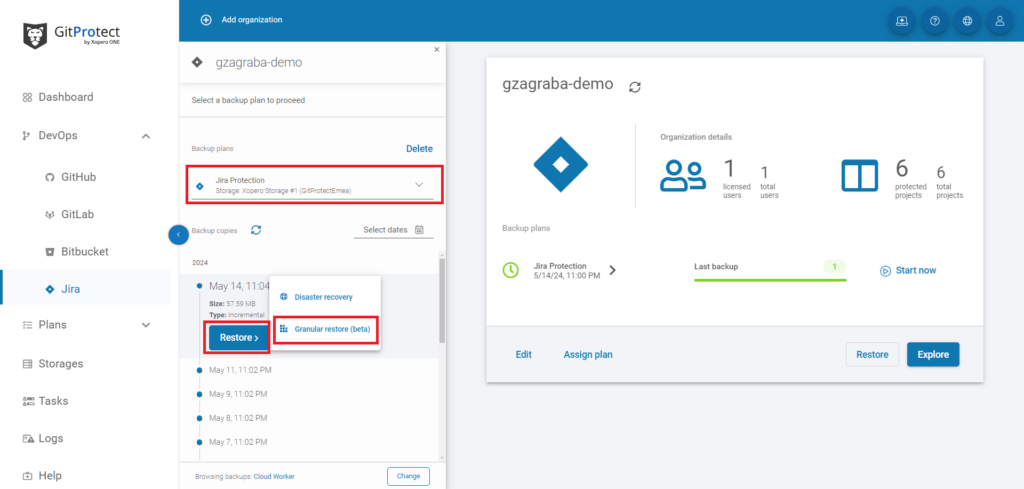
In an opened window, you will need to select the needed backup plan and press the Restore button.
Once you click it, you will see two possible options – Disaster Recovery and Granular Restore. Our option is Granular Restore. So, click it.
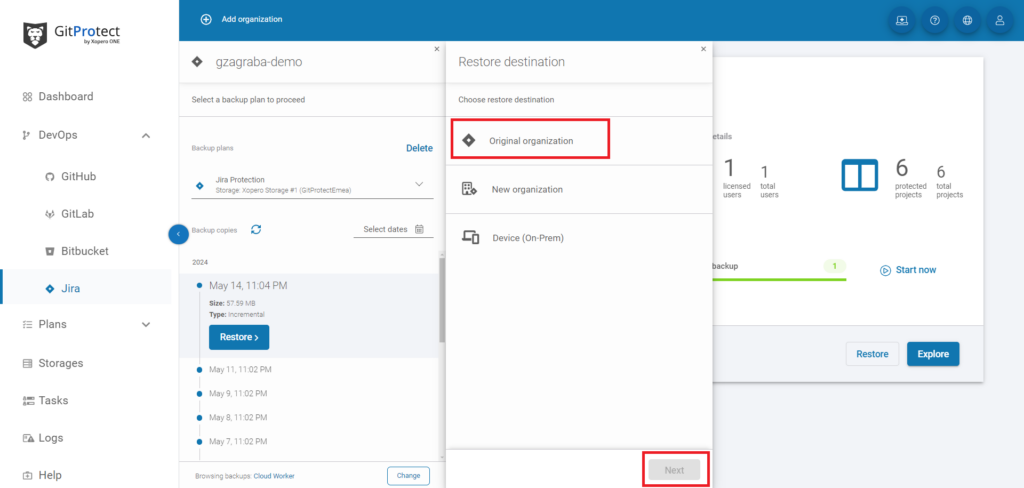
You will see a new window with the Restore Destination options, including Original organization (your Jira instance), New organization, and Device (On-Prem). In our case, we want to restore the deleted issue to our existing Jira account. So, pick Original organization up and press Next.
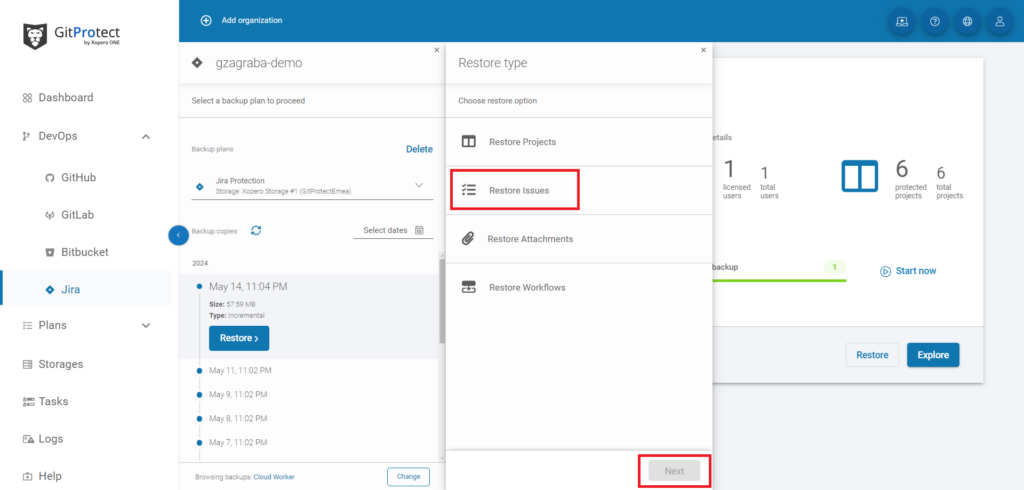
The next step is to choose what data you need to restore – projects, issues, attachments, or workflows. In our case, we have a deleted issue, so let’s choose the Restore Issue option and click the Next button.
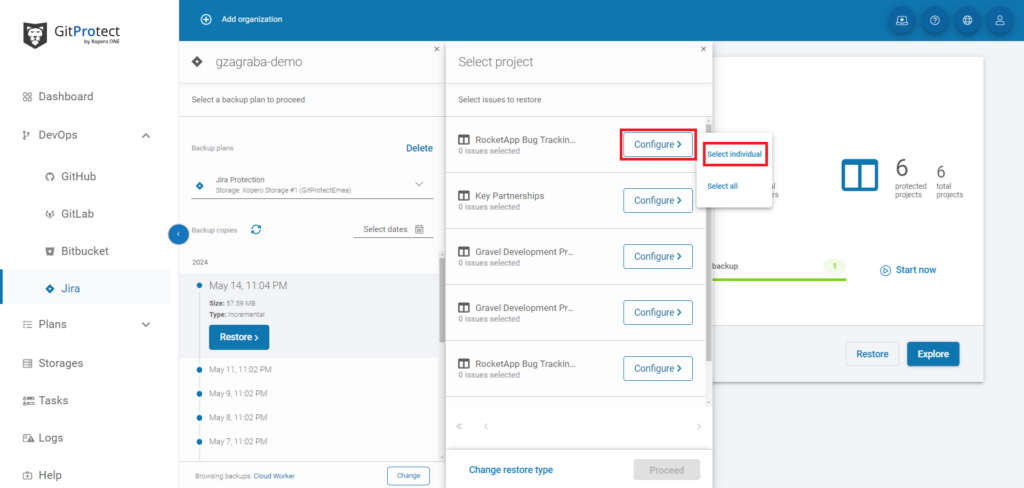
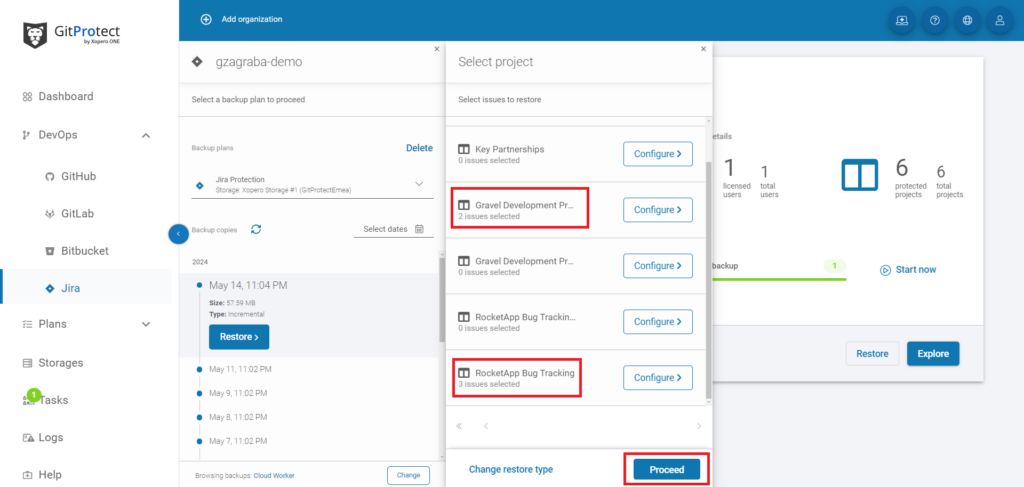
As all your issues are related to different projects, with the next step, you will need to filter issues and select which project contained the delete issue. So, once you see the needed project click Configure and Select individual – don’t forget we want to restore a single deleted issue.
If you want to restore all the issues in the project, you will need to opt for Select all.
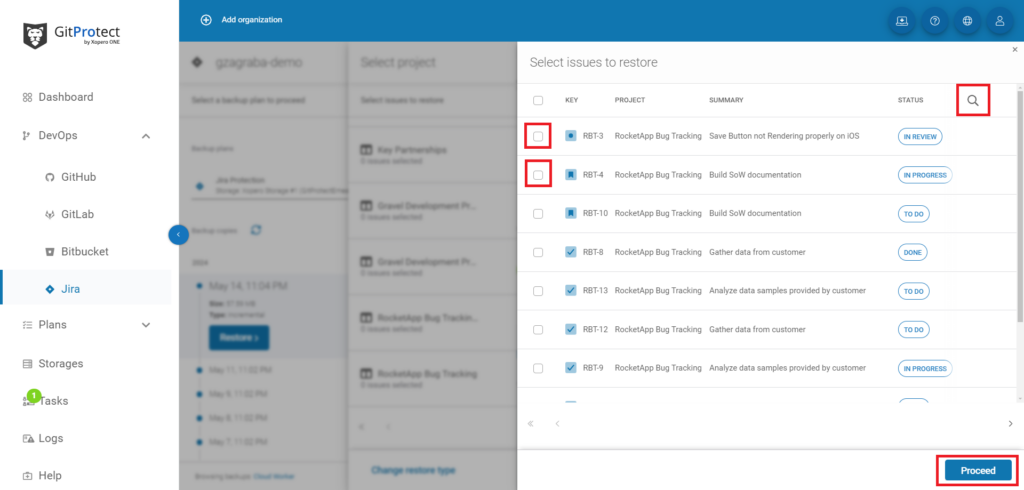
After you define a project, you will see the list of issues of that project. All you need to do is to find a deleted issue. To make the process easier, you can use a search bar and look for the needed issue by key, issue type, or its name.

Once you find a necessary issue or issues, click Proceed.
Then, you will get back to the project window where you can check if you picked up the correct project or projects. If everything is correct, just click the Proceed button.
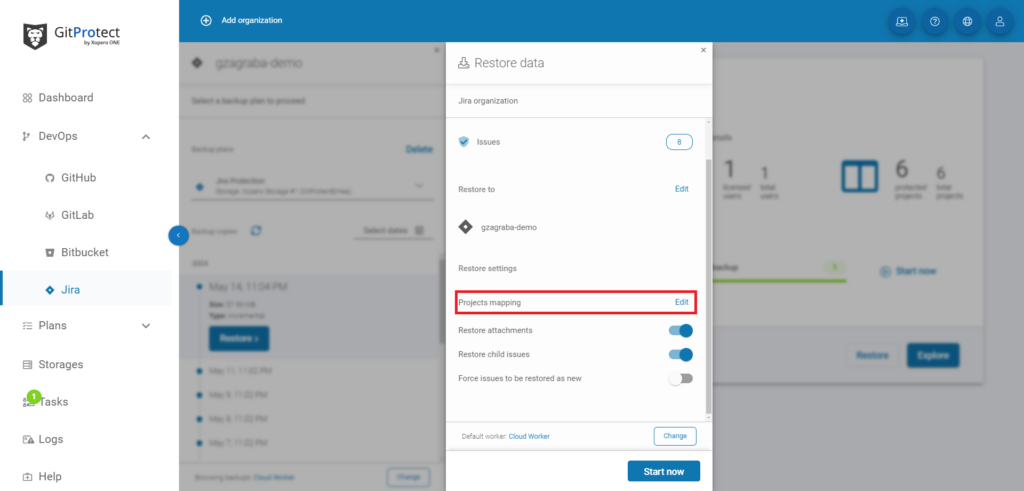
Then, your task is to configure the mapping by clicking Edit. It will give you the possibility to map your restored issue to the existing issue or an absolutely different one. At this stage, you can also define whether you want to restore attachments and/or child issues. As an option, you can also force to restore your issue as a new one.
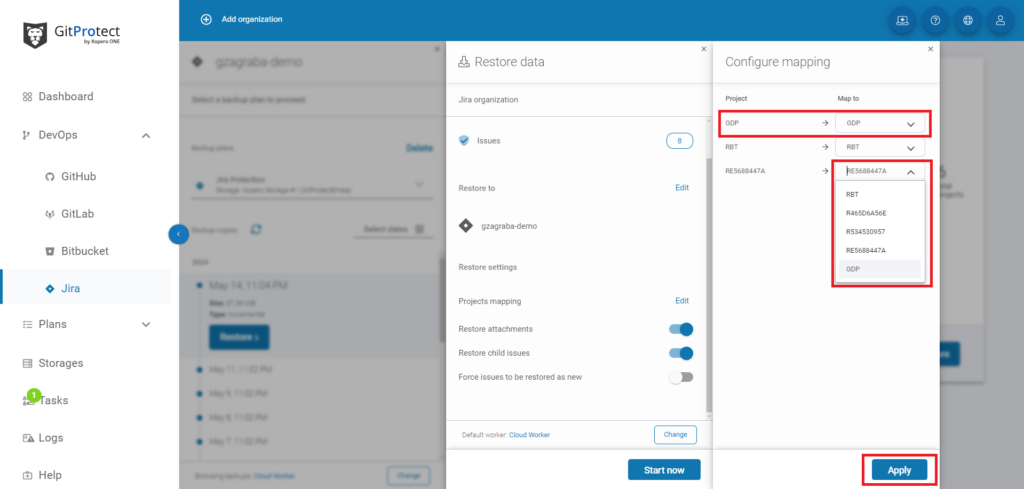
In the Configure Mapping window, you need to pick up the place to map your issue. Then, click Apply.
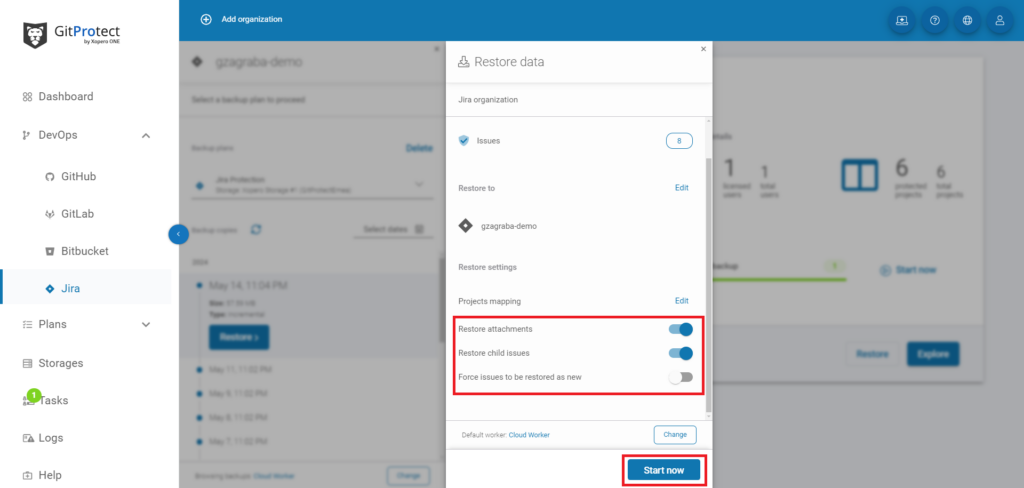
Finally, once the relevant options are set, press Start now. And voilá, your Jira deleted issue or issues are being restored!
Takeaway
Jira regular backups and Jira restore are important parts of the security strategy. And issues are not the only data you need to protect. Imagine, what if something goes wrong with your entire project? What if the project data is lost forever? Catastrophe…
That’s why, note that your Jira backup strategy should include all the Jira account data by default. Thus, you will always be sure that you can access and recover your critical Jira data to guarantee business continuity in project management.
[FREE TRIAL] Ensure compliant DevOps backup and recovery with a 14-day trial🚀
[CUSTOM DEMO] Let’s talk about how backup & DR software for DevOps can help you mitigate the risks
The article was originally published on August 5th, 2024